 |
1) Safety First! Find a level surface. The best way
to work under the car is to drive the rear wheels up good ramps.
(Mine are rated at 12,000 lbs. gross vehicle weight.) Next, set
the transmission in Park (automatic) or in 1st gear (manual),
pull up the handbrake, and chock both front wheels. I recommend
ramps over jackstands.
|
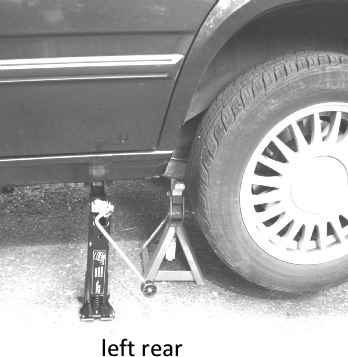 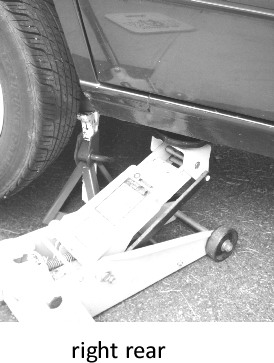 |
2) But, if you don’t have ramps, use good
jackstands. First, set the transmission in Park (automatic) or
in 1st gear (manual), pull up the handbrake, and chock both front
wheels. Because the normal car jack couldn’t lift high enough,
I used a floor jack to lift the left rear of car and inserted
a jackstand. I then released the floor jack to use it on the
right side, also inserting a jackstand there. Then, I used the
stock car jack as backup support for the first jackstand on the
left side. Never rely solely on a jack to support the car while
you’re underneath. The use of jackstands---and jacks as
backups---increases your safety.
|
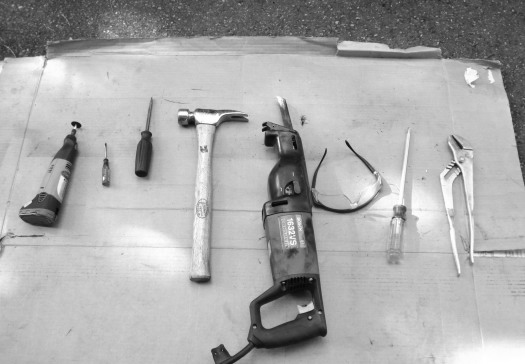 |
3) Good tools make the
job easier (and safer). Left to right:
i) Dremel cordless (10.8 V Lithium Ion Cordless) with 420 cut-off
wheel. A Dremel corded tool will also work. Use these tools to
slot the pipe connections so you can pry them apart.
ii) Small flat-bladed screwdriver to start prying of female connector
off male connection of exhaust pipe.
iii) Larger flat-bladed screwdriver to continue prying process.
iv) Hammer to drive the flat blades of the screwdrivers into
the connection.
v) Reciprocating saw with metal cutting blade makes it easy to
cut through old pipes for easy removal.
vi) Safety glasses. Don’t even attempt this job without
them! Keeps iron dust, particles, and perhaps even a broken cut-off
wheel from hitting your eyes.
vii) Large screwdriver, which can help in prying rubber hanger
off under-chassis hooks that hold the mufflers in place.
viii) Large waterpump pliers for closing those pried female connections
back in place during installation.
ix) Not shown: (a) Soapy water, useful for sliding rubber hanger
off those under-chassis hooks, (b) small tack hammer for hammering
down edges of female connector during assembly. |
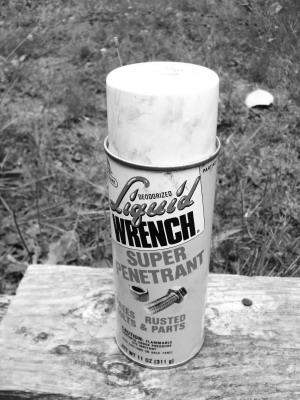  |
4) You only need to remove clamps for a pipe (one
end of connection) you are re-using*. Use penetrating fluid to
help loosen the corrosion around the 13-mm (usually) clamp nut.
Then, use a long-handled wrench to break the nut free and remove.
Either pry the clamp off or slide it along the soon-to-be discarded
pipe.
*Otherwise, just slice through old pipe with the reciprocating
saw (step 9).
|
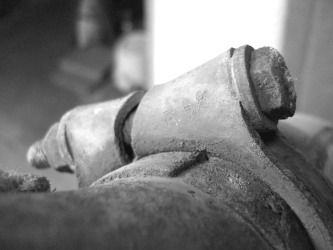 |
5) Note nomenclature on flat face of old clamp where
bolt goes through. It is usually labeled R56 or R58. On the 940,
R58 is used for the front muffler joint to the pipe of the catalytic
converter. I believe all of the other joints use R56, but you
should doublecheck me on this. |
 |
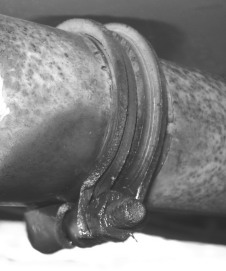
6) Here, I am initiating the prying of the female
connector because the underlying male pipe belonged to a lifetime
warranty muffler that was still in good condition. This is just
brute force using a flat-bladed screwdriver and hammer. Pry up
a little, then use Dremel tool to slot the connection (below).
|
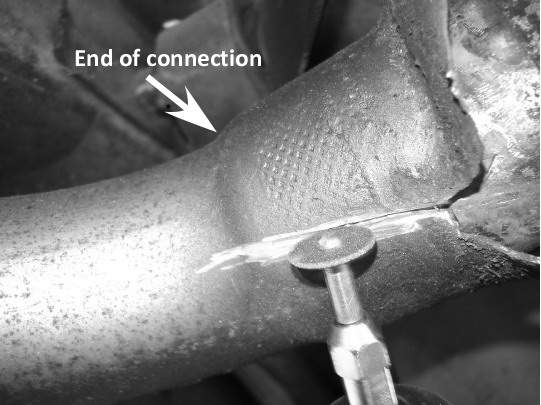 |
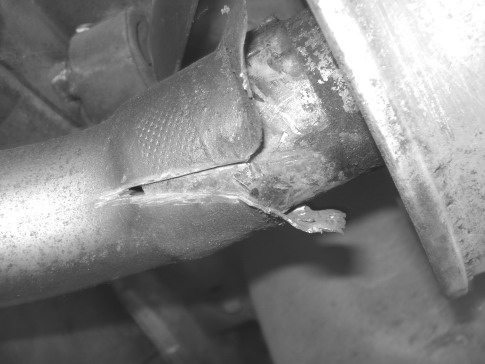
7) Slotting the female connector (of the pipe to
be discarded) with the Dremel tool makes it much easier to peel
the connections apart. Be careful that you don’t cut into
the underlying male pipe. While cutting, you will see bright
silver as the cutting wheel cuts into the steel. Once you cut
through the female connection, you will be able to see the dark
space between the two pipes. The end of the connection is indicated
by the narrower diameter of the female pipe (arrow). Normally,
all you need are 2 slots about 90-100 degrees apart. (Limited
access underneath the car will most likely prevent the slotted
cuts being 180 degrees apart. Usually, the factory-made slots
are 120 degrees apart---though some are 90 degrees apart--- and
make a natural starting place for your cutting slots.) After
making slots, pry connection apart with screwdriver blade and
hammer. If you are experiencing undue difficulty, make another
slot.
|
 |
8) This
photo shows the female connector peeled apart. Note that the
underlying male connector of this lifetime warranty muffler is
in good shape. If the underlying pipe is not in good condition,
then replace that piece.
|
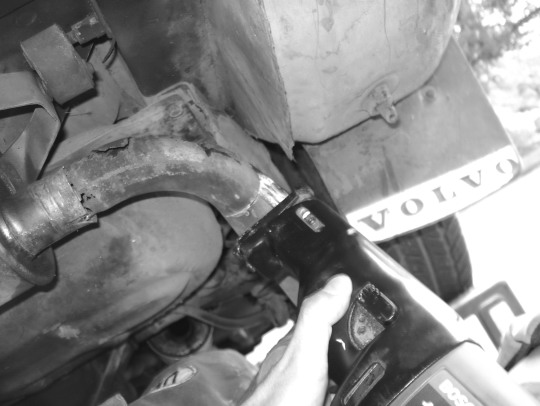 |
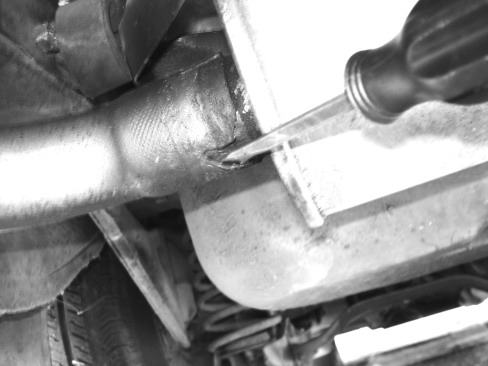
9) For those sections of the exhaust system that
you are going to discard (like the corroded, holey under-axle
pipe shown in this photo), the reciprocating saw with metal blade
makes short work of the cutting process. Be careful not to hit
adjacent parts, such as the gas tank.
|
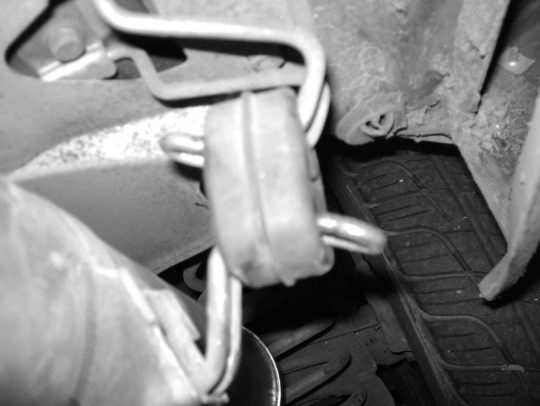 |
10) Both mufflers are suspended via rubber hangers
onto the chassis. I have found that it is best to lift the rubber
off the top (chassis) hook rather than trying to work the bottom
(muffler) hook through the rubber hole. If needed, soapy water
should help. You may have to use your leg or knee to press up
against the muffler so that you can work the rubber off the upper
hook. This same technique works for installation.
Disassemble the metal bands of the hangers on the old mufflers.
Inspect them. Replace parts, if needed. Be sure to measure their
locations on the old mufflers and install them on the new mufflers
at the same position. This ensures that the rubber hangers will
align to the chassis hooks.
|
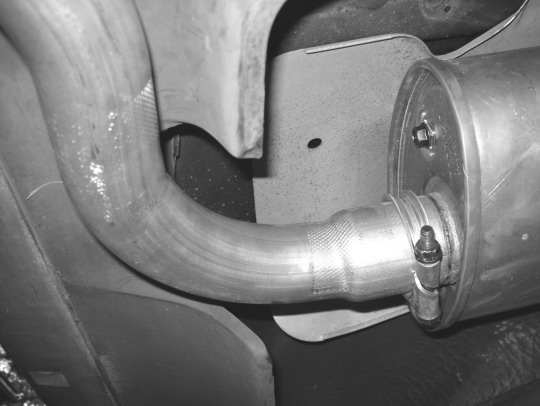 |
11) Use same type clamp for installation. Make sure
you’ve slipped on the clamp before joining the pipes.
If you forget, you may be swearing up a storm because the pipes
can be hard to separate once joined. Set the clamp at about the
bottom third or half of the slotted portion of the female connector.
As you tighten the clamp, you should see the slot being squeezed,
narrowing in size.
As you drive, the connections
will seal airtight.
Congratulations! You’ve
replaced your exhaust system! |