Home


Basics of Diagnoses and Other Hints


Simple No-Start Fix on 240

Whenever something goes awry with your Volvo, always work through the simplest solutions first. For example, our 244 Volvo has broken down a number of times (engine no-start). Many times the solution was a simple fix, such as the fuse to the main fuel pump. Another recurrent problem was a bad contact in the battery ground cable over the left front wheel well (arrow, left). When this contact gets corroded, the engine will not start.


Tips in diagnosing no-starts

An old battery (>5 yrs) may give spurious results because it quickly runs down in tests. Recharge as necessary. Subsequently, if it fails to hold charge, replace it

The diode tester (beep mode) on a digital multimeter is great for continuity tests, but it cannot discern a short circuit (~0.1 ohms)—use lowest ohmmeter setting, instead. Also, digital multimeters have different resistance ranges over which they will beep for continuity checks. For instance, my old Fluke 73 Series multimeter beeps for resistances < 210 ohms; my Cen Tech model beeps for resistances < 60 ohms.

Realize that a probable cause for a no-start may be a broken wire, which can be confirmed by a null continuity test. Breaks are more likely within the engine wiring harness—which is exposed to oil, heat, and in some cases, chafing—rather than, for instance, wiring in the passenger compartment.

Continuity and resistance tests are run with the key out of the ignition.

Doublecheck multimeter leads are solidly connected when running tests. Your wallet depends on it.

Once diagnosed, some faults are easy to fix, such as replacing a faulty fuel injection relay, ignition coil, or Power Stage. Others are difficult, such as replacing a timing belt or main fuel pump.


Removing the old exhaust system

The easiest way to remove corroded, stuck exhaust pipes is to use a reciprocating saw with metal blade. Use this tool for old pipes or sections you're going to discard. If you need to save one section of the exhaust system, use a Dremel Moto tool with a 420 cutting disk. The Dremel tool fits in the hand and angles easily. Make 2 slots about 120 degrees apart along the length of the connection on the old exhaust pipe (without cutting the good pipe underneath), and use a flat-bladed screwdriver and hammer to peel away the old pipe. If it is still hard to peel off, make more slots. See Replacing the exhaust system.


When installing new parts goes awry

 
 Old  New

Oops, it seems I was wrong. A professional mechanic said the back of the hanger plate is supposed to be flat. "Something is out of alignment," he said. I gave up in defeat and installed the old roller. My guess is that one of the camshafts is not aligned with the crankshaft and other camshaft, but I have not verified this opinion.


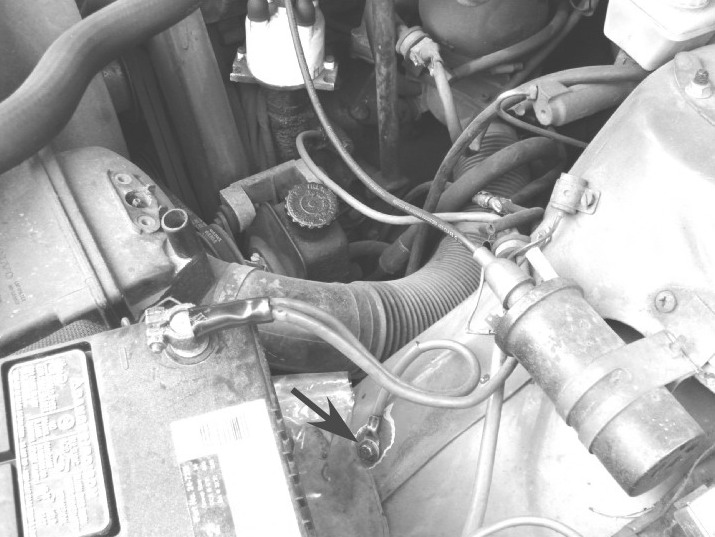
Changing the timing belt on my 1987 740 turbo, B230FT engine

I spent one week trying to figure out this problem. After installing the new belt, one should rotate the crankshaft twice (720 degrees clockwise, as seen by an observer in front of engine, looking toward back---I was a physicist once, you know) to see whether the belt slips. When I did so, the belt was indeed slipping forward off the tensioner roller and the overhead camshaft gear. I went through various possibilities, including: (a) removing washer from in back of overhead camshaft gear, (b) pulling crankshaft gear off and checking that shims and pulley boss were pushed up tight against face of crankshaft, (c) using different timing belts, (d) checking to see that all pulley gears were aligned, (e) replacing new tensioner spring with old one. Scratch my head. Went online to get help from Tech at www.volvoforums.com.

Almost bought new camshaft gears, thinking that the teeth might have become too worn to hold the belt in place. Another option was to put another 2-mm washer in back of the overhead camshaft to push the gear forward more.

Think! Think! Think!

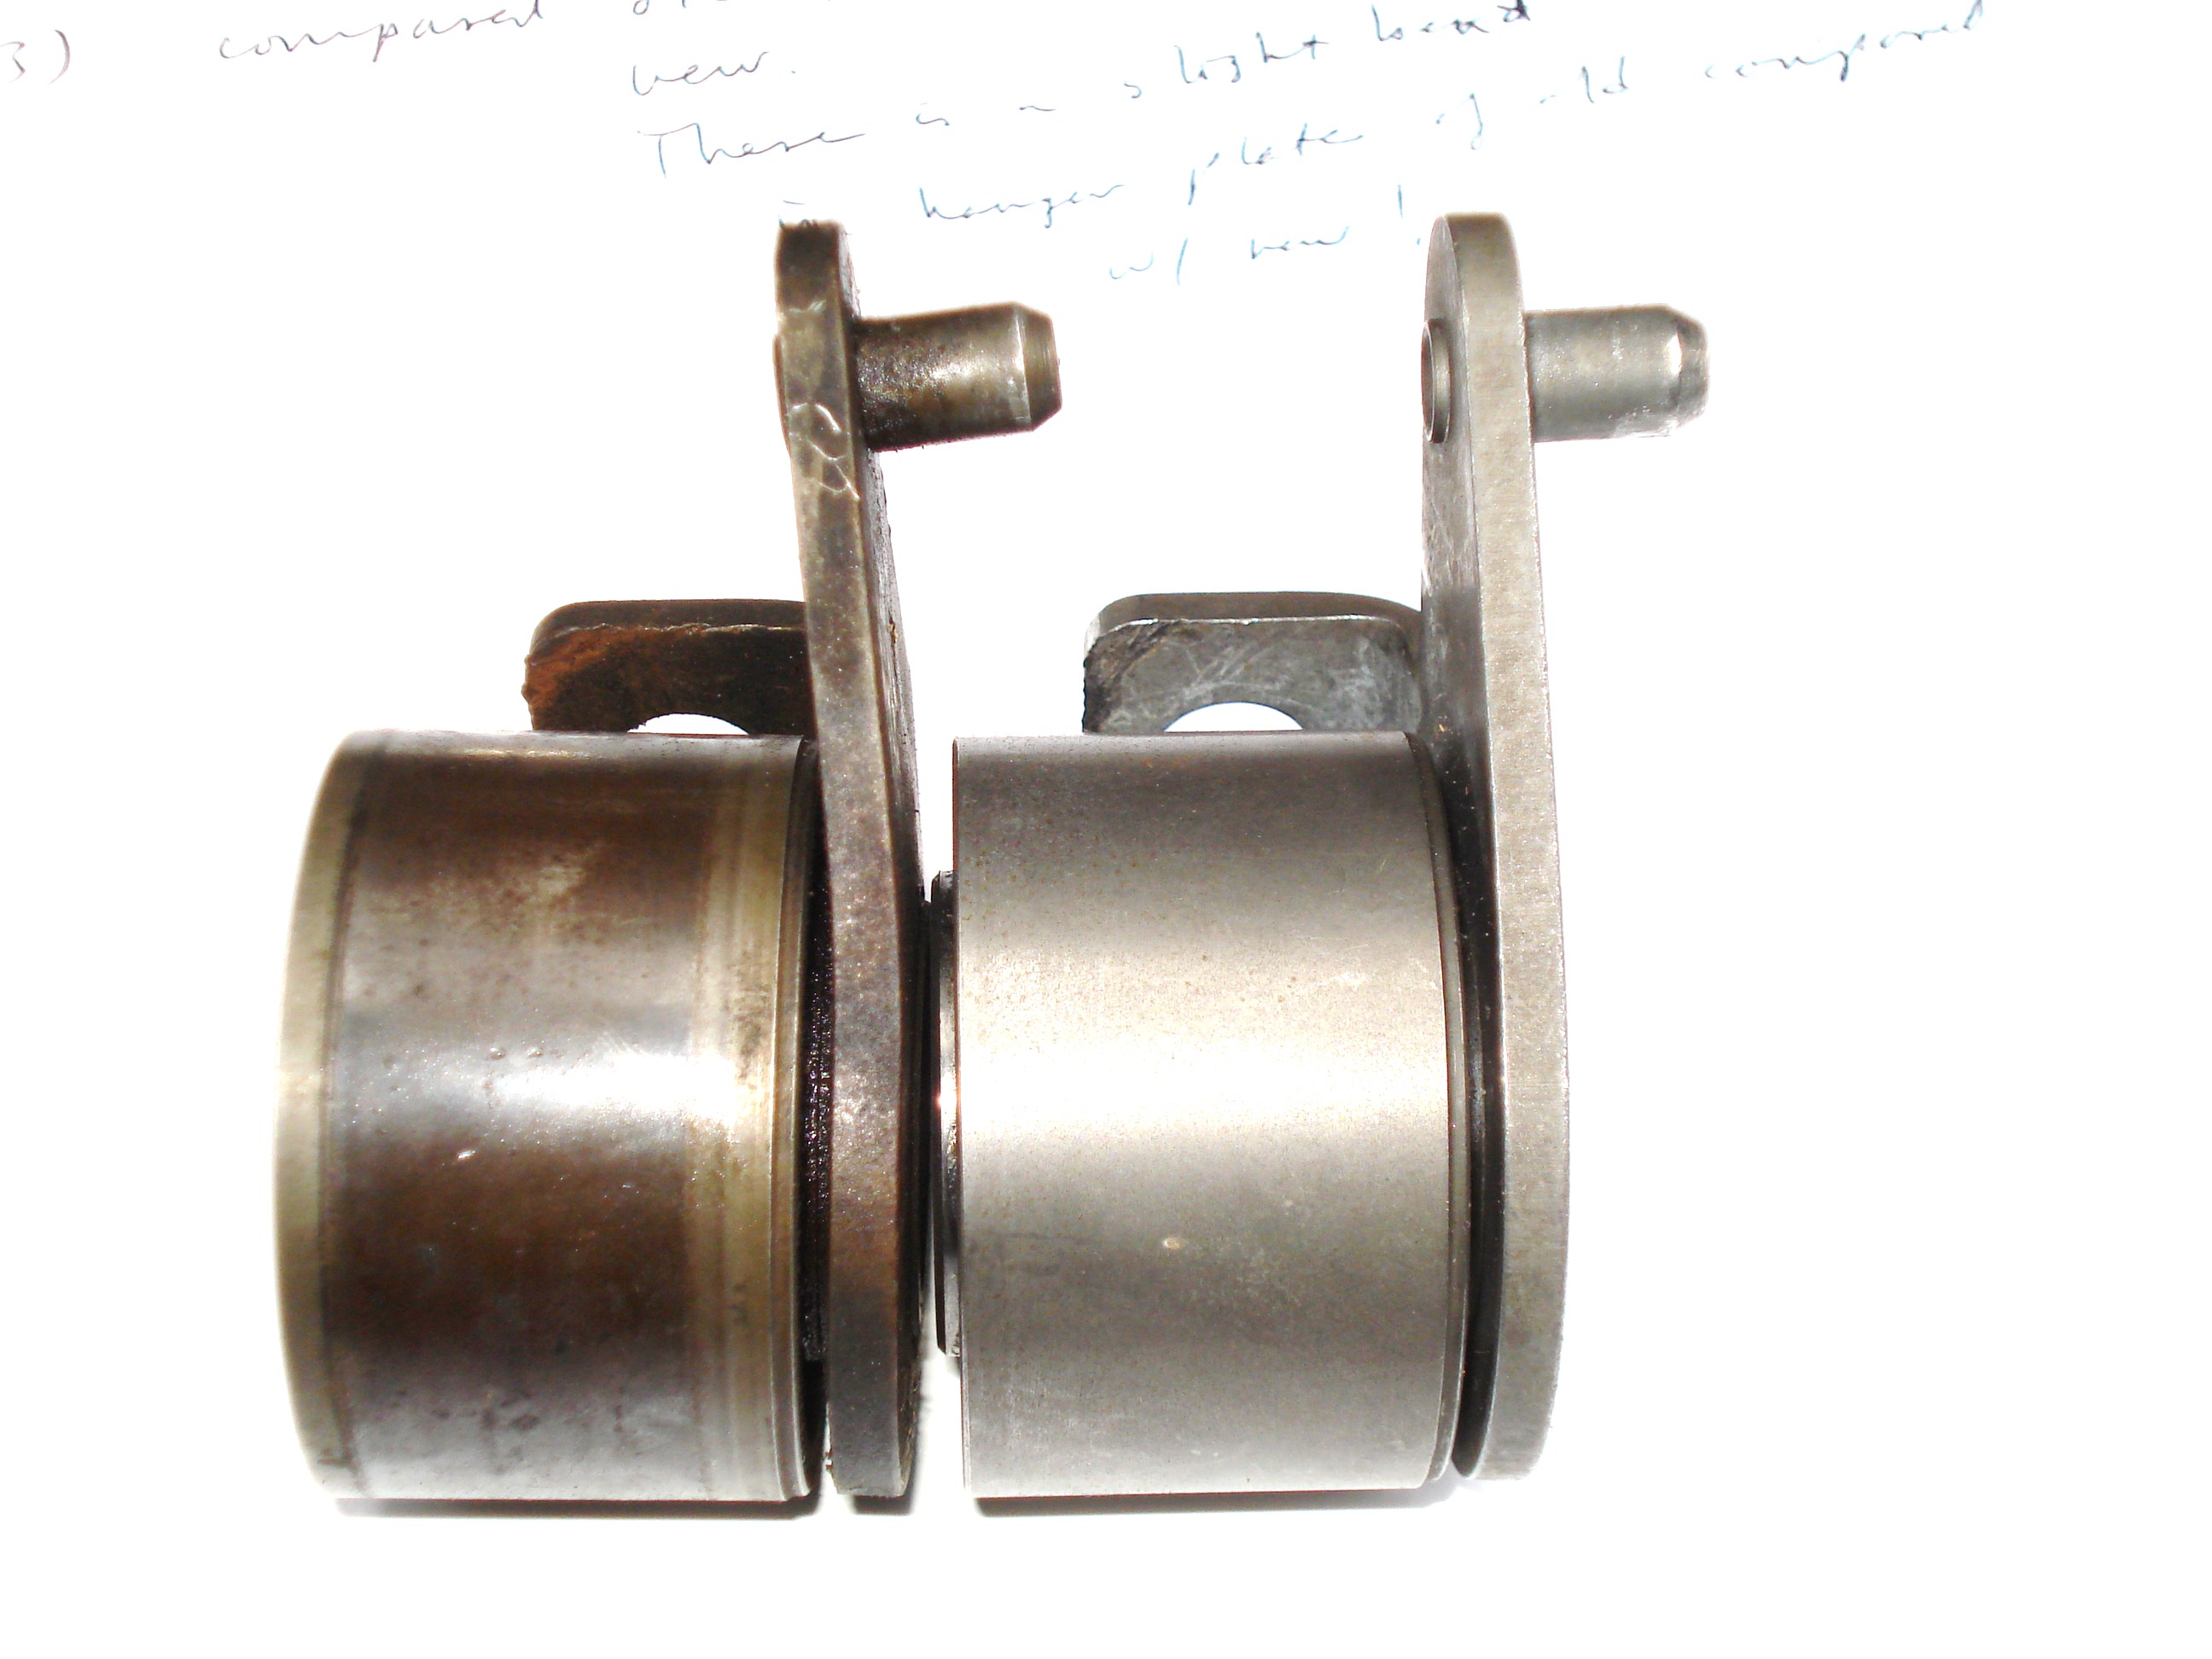
Finally, what did I replace? I replaced the tensioner roller and timing belt. Then, let's check the new tensioner roller (right, in photo) against the old (left, in photo). When I did, I discovered that the old INA tensioner had a slight bend on the back hanging plate while the new INA tensioner did not. I then installed the old tensioner with the new timing belt and rotated the crankshaft 2X. Problem solved! Belt did not slip off roller or overhead camshaft.

Lesson learned: If installation of a new part goes awry, check that part against the old one.